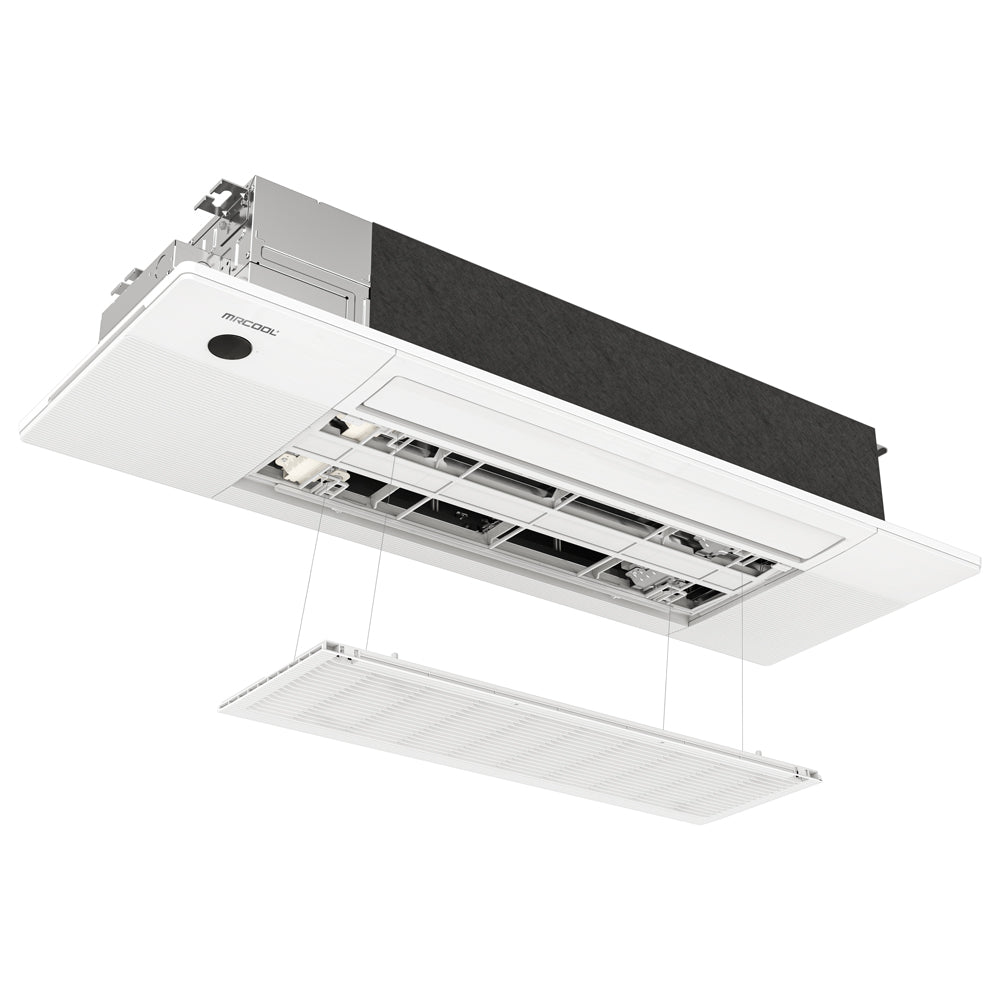
Are you tired of battling the summer heat and sacrificing style for comfort? Look no further than the DIY Mr. Cool Ceiling Cassette Installation! With this innovative solution, you can maximize your comfort levels without compromising on style. The Mr. Cool Ceiling Cassette offers a sleek and modern design that seamlessly blends with any home decor. Gone are the days of bulky and unsightly window units that disrupt the aesthetic of your living space. This easy-to-install system provides efficient cooling and heating, ensuring a comfortable environment all year round. Whether you're renovating your home or simply looking for an upgrade, the DIY Mr. Cool Ceiling Cassette Installation is the perfect solution. Say goodbye to sweltering summers and hello to a stylish and comfortable living space.
Shop for Mr. Cool Cassettes here.
Benefits of Installing a Mr. Cool Ceiling Cassette System
Installing a Mr. Cool Ceiling Cassette System comes with a host of benefits. Firstly, the sleek and modern design of the ceiling cassette unit adds a touch of elegance to any room. Unlike traditional window units, the ceiling cassette system is discreet and blends seamlessly into the ceiling, leaving your walls free for artwork or other decorative elements. This means you can enjoy both comfort and style without compromise.
Secondly, the Mr. Cool Ceiling Cassette System provides efficient and effective cooling and heating. It utilizes advanced technology to evenly distribute cool or warm air throughout the room, ensuring a consistent and comfortable temperature. Its powerful yet quiet operation allows you to relax and enjoy a peaceful environment without any disruptive noise.
Additionally, the DIY installation process makes it easy for homeowners to upgrade their homes without the need for professional help. This not only saves you money on installation costs but also gives you the flexibility to choose the perfect location for your ceiling cassette unit. Whether you want to install it in your living room, bedroom, or home office, the Mr. Cool Ceiling Cassette System can be customized to suit your needs.
Factors to Consider Before Installing a Mr. Cool Ceiling Cassette System
Before diving into the DIY installation process, there are a few factors to consider. Firstly, you need to assess the size of the room you want to cool or heat. The Mr. Cool Ceiling Cassette System comes in various capacities, so it's important to choose the right size to ensure optimal performance. A unit that is too small may struggle to cool or heat the room effectively, while a unit that is too large may result in wasted energy and higher utility bills. Use our sizing calculator to correctly choose your system - or give us a call at 866-399-0206.
Another important factor to consider is the layout of your room and the location of the ceiling cassette unit. Ideally, the unit should be installed in the center of the room to ensure even air distribution. You should also consider the height of the ceiling, as the unit needs adequate space for installation and maintenance.
Lastly, it's crucial to ensure that your home's electrical system can support the power requirements of the Mr. Cool Ceiling Cassette System. It's recommended to consult with a qualified electrician to assess your electrical system and make any necessary upgrades before proceeding with the installation.
Step-by-Step Guide to DIY Installation of a Mr. Cool Ceiling Cassette System
Now that you have considered the necessary factors, let's dive into the step-by-step guide for installing a Mr. Cool Ceiling Cassette System. Before you begin, gather all the tools and materials you will need for the installation.
Tools and Materials Needed for DIY Installation
- Mr. Cool Ceiling Cassette System
- Measuring tape
- Drill and drill bits
- Screwdriver
- Level
- Pipe cutter
- Vacuum pump
- Refrigerant gauges
- Copper tubing
- Electrical wires
- Insulation tape
- Mounting brackets
1) Preparing the Installation Area for a Mr. Cool Ceiling Cassette System
Start by choosing the ideal location for your ceiling cassette unit. Measure the dimensions of the unit and mark the center of the installation area on the ceiling. Use a level to ensure the markings are straight and aligned.
Next, carefully cut an opening in the ceiling according to the dimensions of the unit. Be mindful of any electrical or plumbing lines that may be present in the area. Once the opening is cut, clean up any debris and ensure the area is clear for installation.
2) Installing the Indoor Unit of a Mr. Cool Ceiling Cassette System
Begin by assembling the indoor unit according to the manufacturer's instructions. Attach the mounting brackets to the unit and secure them to the ceiling using screws. Make sure the unit is level and securely fastened.
Next, connect the copper tubing to the indoor unit. Use a pipe cutter to cut the tubing to the appropriate length, ensuring a clean and straight cut. Connect the tubing to the unit, making sure to tighten all the fittings securely.
3) Installing the Outdoor Unit and Connecting the Refrigerant Lines
Locate a suitable location for the outdoor unit, ensuring it is positioned away from any obstructions and has adequate ventilation. Install the unit on a sturdy surface or use mounting brackets for secure placement.
Once the outdoor unit is in position, connect the refrigerant lines between the indoor and outdoor units. Use a vacuum pump to remove any air and moisture from the lines before connecting them. Ensure that all connections are tight and leak-free.
4) Wiring and Testing the Mr. Cool Ceiling Cassette System
Consult the manufacturer's instructions to correctly wire the indoor and outdoor units. Run the electrical wires through the designated channels and connect them to the appropriate terminals. Use insulation tape to secure and protect the connections.
Before testing the system, double-check all the connections and ensure that the power supply is switched off. Once everything is in order, turn on the power and test the unit. Adjust the settings to your desired temperature and monitor the system for any irregularities or issues.
5) Maintenance Tips for a Mr. Cool Ceiling Cassette System
To ensure the longevity and optimal performance of your Mr. Cool Ceiling Cassette System, regular maintenance is essential. Here are a few tips to keep in mind:
- Clean or replace the air filters regularly to maintain good indoor air quality and prevent strain on the system.
- Check the outdoor unit for any debris or obstructions and clean it as needed.
- Inspect the refrigerant lines for leaks or damage and repair them promptly.
- Schedule annual maintenance with a qualified technician to check for any potential issues and ensure the system is running smoothly.
Conclusion: Enjoy Year-Round Comfort and Style with a DIY Mr. Cool Ceiling Cassette Installation
With a DIY Mr. Cool Ceiling Cassette, you can transform your living space into a haven of comfort and style. Say goodbye to the days of unsightly window units and hello to a sleek and modern cooling and heating solution. By following the step-by-step guide and considering the necessary factors, you can easily install the Mr. Cool Ceiling Cassette System yourself and enjoy year-round comfort. Remember to prioritize regular maintenance to keep your system running efficiently and effectively. Upgrade your home today and experience the perfect blend of comfort and style with the DIY Mr. Cool Ceiling Cassette Installation.
Shop for Mr. Cool Cassettes here.